Design Your Perfect Outdoor Space
Enhance your outdoor space by constructing a pergola that adds a touch of style, comfort, and sophistication. This comprehensive guide provides step-by-step instructions, adaptable plans, and customization options to suit your skill level and design preferences, ensuring you can create a shaded outdoor living area that perfectly complements your home. Or, if you’re envisioning something more refined, you can build your custom cabana with options tailored to your space and taste.
While we provide guidance on pergola installation, at StruXure, all Pergola X and Cabana X installations are exclusively handled by StruXure’s licensed professionals to ensure safety and security.
Table of Contents
Planning is Key When Building a Pergola
When constructing a pergola, thorough planning is of utmost importance to ensure its success. Before ordering materials, decide on the location, size, purlin spacing, and quantities needed. A combination square helps with precise measuring and marking during construction, ensuring accurate cuts and assembly. Using a pattern when marking cuts on wood creates a consistent appearance.
Location and Size
The placement of your pergola is key. Use stakes to mark and align post locations accurately. It can either be installed close to the house for convenience, or set as a stand-alone feature which will become an eye-catching centerpiece in your garden. Take into account how much room you have and what its purpose should be, if wanting respite from hot weather building on an existing patio would make great sense. Ensure that when erecting posts, they are placed equidistantly apart to create a symmetrical shape. Additionally, consider installing the pergola on a concrete patio and drill into the concrete for stability.
You need to be mindful of where you are placing the pergola in your outdoor space. There are many different surfaces you can easily construct into a patio or deck for the pergola. Or perhaps you already have an existing patio. When excavating holes for the poles, check under the surface, so you don’t bump against any gas mains or wires beneath ground level – depth requirements differ according to local regulations but 30 inches down works best with backyard freestanding structures like this one. Use a reference point, such as the sill of a patio door, to ensure accurate measurements and level posts. Make sure the string line used for measuring post bases is very tight and level to achieve precise offsets.
Materials Selection
When constructing a pergola, both aesthetics and durability must be taken into consideration when selecting the materials. The beams of the pergola will extend over the patio area, requiring precise measurements and adjustments to ensure a solid and level structure.
Wood is always a popular choice and composite material is another viable option since it’s resistant to rot and insects while being low maintenance with a long lifespan. A jigsaw is perfect for cutting posts that are made from either hollow core composite or traditional wooden ones, whichever gives your plan its desired look. For making precise cuts on wooden beams and posts, especially for deeper cuts, a circular saw is highly effective and ensures accuracy. When choosing what sort of posts best suit your pergola design, make sure they will stand up strong over time while giving an attractive finish to your space. You may also need to remove portions of a ledger to create notches that allow beams to interlock properly.
Design Considerations
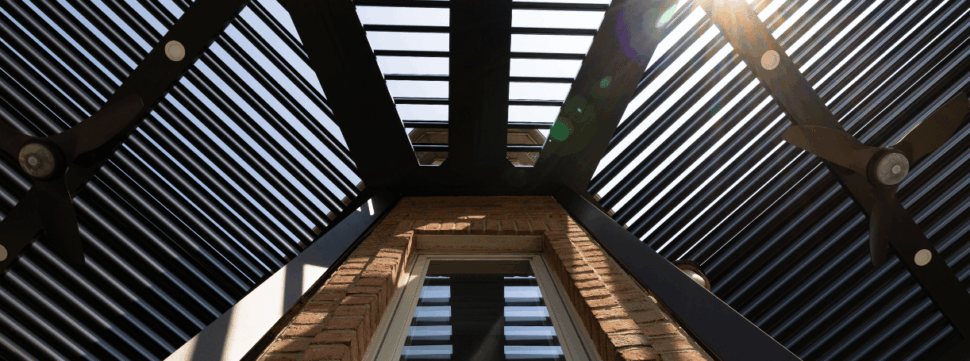
Designing a pergola for your backyard is an enjoyable and creative process that allows you to craft a unique personal space. Begin by selecting materials and deciding on a roof design, ensuring the pergola’s roofline complements the house’s fascia for a polished look. The roof of a pergola‘s construction requires notched lower rafters positioned perpendicular to upper rafters to provide shade and stability. For a decorative touch, consider customizing the ends of the rafters with unique patterns.
Incorporating lattice into this design has many benefits: it adds texture, offers extra shading areas, provides a climbing frame for plants such as flowers or vines (whatever suits your style) making it truly unique. The thought behind naming the ‘secondary’ beams is due to their bending load resistance characteristics, despite potential confusion in terminology.
Essential Tools and Materials
Before you start building your pergola, it’s crucial to gather all the necessary tools and materials. Having everything on hand will make the project smoother and more enjoyable. Here’s a comprehensive list of what you’ll need:
- Lumber: 2x8s, 2x10s, 2x6s, and 4x4s for the main structure.
- Post Bases: To secure the posts to the ground.
- Concrete Anchors: For added stability.
- Screws: Lag screws, deck screws, and stainless steel screws for various parts of the construction.
- Drill and Bits: A hammer drill with carbide-tipped masonry bits for drilling into concrete, and a combination square for precise measurements.
- Circular Saw: Essential for cutting lumber to the correct lengths.
- Jigsaw: Useful for making more intricate cuts.
- Reciprocating Saw: For cutting through tougher materials.
- Palm Router: For smoothing edges and creating decorative details.
- Sander: To smooth out rough surfaces.
- Safety Gear: Safety glasses to protect your eyes.
- Work Light: To ensure you can see clearly, especially if working in low light conditions.
- Ladder: For reaching higher areas safely.
- Measuring Tools: Measuring tape, square, and level to ensure everything is aligned correctly.
- Clamps: To hold pieces in place while you work.
- Hammer: For driving nails and securing parts.
- Planning Tools: Pencil and paper for planning and marking measurements.
- Weather-Resistant Wood Glue: To secure joints and add strength.
- Wood Filler: Optional, for filling any gaps or imperfections.
- Paint or Stain: Optional, for finishing the wood and protecting it from the elements.
It’s important to note that depending on the design and size of your pergola, you may need additional materials. Always check your local building codes and regulations before starting your project to ensure compliance and safety.
Preparing the Ground and Setting Posts
Proper ground preparation is essential for a stable pergola installation. Check local codes for required hole depth (at least 30 inches for freestanding structures). Consider frost depth and soil type, as these affect stability and hole depth. Be mindful of underground utilities when digging. Use a hammer drill for hard surfaces like concrete when installing post bases. Following these steps ensures a stable and beautiful pergola that meets your desired vision.
Digging Holes and Adding Gravel
Digging holes for your pergola posts can be made easy by using a hand-held post hole digger or renting a power auger. Pound stakes into the ground to brace the posts and ensure proper alignment. Adding 6 to 8 inches of gravel at the bottom and 2/3 up sides of each hole will ensure good drainage. As you do that, remember that digging these pergola post holes is also key! Using a string line to ensure that the posts are aligned and level during the construction process is crucial for maintaining straightness, especially if the patio has a slope. Insert forming tubes into the holes before pouring concrete around the posts to ensure proper alignment and stability.
Pre Drilling Holes and Installing Posts
After the holes have been excavated and gravel added, you can then move onto setting up your posts. An easy way to make sure they are even is by attaching a level to a 24 inch ruler against the house to check that each post’s height matches the mark on it. Employing concrete as an anchor for these posts will guarantee support and security.
To ensure the posts are securely anchored and stable during assembly, pre drill holes that align with the post base screws. This will help in securing the posts effectively. Make sure to tighten the screws to achieve a snug fit between the structural elements.
Once the groundwork has been done, it is time to erect the posts of your pergola. Holes must be dug and filled with concrete for a stronger support that will carry the weight of your structure as well as withstand different weather conditions. When blending together cement with water, be certain that all air gaps have been removed before pouring some of this mix onto your chosen concrete slab area below.
Pressure-treated pine is a great option for providing reliable strength. Once the wooden posts are positioned correctly, add a pair of wood plugs to the columns for additional stability as a finishing touch and part of the overall structural assembly.
Post Bracing and Support
Ensuring alignment and stability during the building process requires stabilizing and strengthening the pergola posts. Tack the braces to the posts by nailing them down to position and stabilize the posts before permanently fastening them with screws. Bracing materials such as 2×4’s or 2×6’s can be used for extra support to ensure each post is installed in a plumb position, attached with galvanized screws or nails that are protected against rusting. For additional support and stability, consider constructing braces using two boards, specifically double 2×6 pieces, that are glued and nailed together.
A level should also be utilized to make sure all of the braces remain flush while working on other areas. Followed by using a spirit level tool so you can check if every single post is aligned correctly vertically.
Constructing the Pergola Framework
Once the posts of your pergola are firmly set, you can start building its framework with beams, rafters and lattice to provide it stability. The framework is designed for both stability and aesthetic appeal, enhancing the overall look of your outdoor space. These components will also create a sheltered space for leisure that you’ll definitely enjoy spending time in. Ensure that the bottom edge of beams and notches are aligned correctly during assembly to achieve a stable and visually appealing result.
When positioning the beams, make sure the bottom edges are facing upwards. This orientation is crucial for accurately measuring and cutting half-lap notches, ensuring a precise fit between the main and secondary beams in the structure.
Installing Beams
To begin with the pergola beam installation, it is necessary to make sure there’s a perfect 90° angle by measuring diagonally between the two spots marked. Establishing perpendicular lines to a reference line is essential to ensure accurate measurements and square corners when installing beams. You can use either Western Red Cedar, Pressure-Treated Pine, Tropical Hardwood or European Green Oak for this project. When cutting and preparing them for attaching to posts using screws or bolts, be mindful of their length as they must fit securely in place before fastening completely. It is possible that you might need different types of material such as pine when constructing your beams. Keep that on hand too if required. Using these specific materials means achieving a stable and visually appealing structure.
Using a Circular Saw for Adding Rafters
When adding rafters to your pergola, for greater structural stability and a pleasant shaded area, you’ll need the right measurements. Measurement A should be added to 1’6” with ease when calculating the required length of each rafter. Ensure you accurately cut the rafters to the required length for proper fitting and alignment. Secure 28 flat pieces by driving three 3-in screws into them at an angle on opposing sides. As far as materials go, use 210 treated pine for cutting out their tails accordingly before installation is complete! Completing the job of adding rafters brings a great sense of satisfaction and accomplishment.
Incorporating Lattice
Incorporating lattice into your pergola is a great way to make it more interesting and unique. With its airy structure, the lattice provides additional shade for your outdoor space while also providing an ideal support system for plants such as vines and flowers that can climb along the panels of the pergola, creating a natural atmosphere in which to enjoy time spent outdoors. Climbing plants can be grown along the lattice, enhancing the pergola’s functionality and beauty. Design elements should be explored thoroughly when working on this special kind of project so that one’s personal touch will truly show in their custom-built piece. The lattice design can complement the surrounding features, creating a cohesive and aesthetically pleasing outdoor space.
Finishing Touches and Maintenance
After you finish building the frame of your pergola, take measures to maintain its state and aesthetic. It is important to keep the area clear of debris during maintenance to ensure optimal results. Applying either paint or stain is an effective way to retain the structure’s beauty over time. Maintenance should be a regular routine in order for it to last long-term, making the process comfortable and enjoyable.
Painting or Staining
To ensure maximum quality and weather protection for your pergola, it is recommended to use exterior latex, acrylic paint, or stain. Before applying the chosen finish, make sure to prepare the wood surface by cleaning it with appropriate cleaning agents and consider the temperature and humidity levels. For optimal durability, select a paint or stain specifically designed for thicker materials. Remember to allow adequate drying time after application to achieve the best results.
Ongoing Maintenance
By following a few simple tips, your pergola will remain an attractive and inviting outdoor space for years to come. Inspecting the wood structure on a regular basis (every three or four months at least) can help you spot any damage before it becomes too serious. Regularly cleaning your pergola of debris helps keep it looking its best while also protecting against rot and decay that may be caused by built-up dust particles in between maintenance checks. Keeping up with these measures should ensure enjoyment of your beautiful outdoor area for many years ahead!
Customizing Your Pergola for Your Outdoor Space
Your DIY pergola project is finished! Now’s the time to personalize this outdoor space and make it your own. Consider furniture, lighting, plants, and landscaping to transform this area into a unique and inviting retreat. If you’re feeling overwhelmed by the possibilities, premade pergola plans offer design inspiration and material guidance.
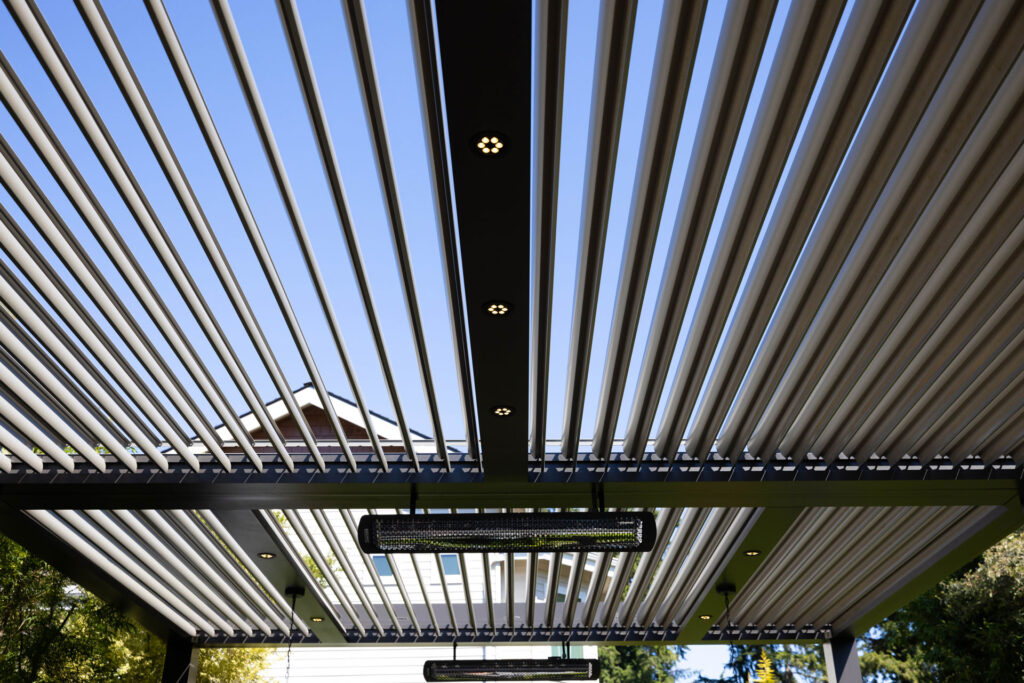
Lighting Options
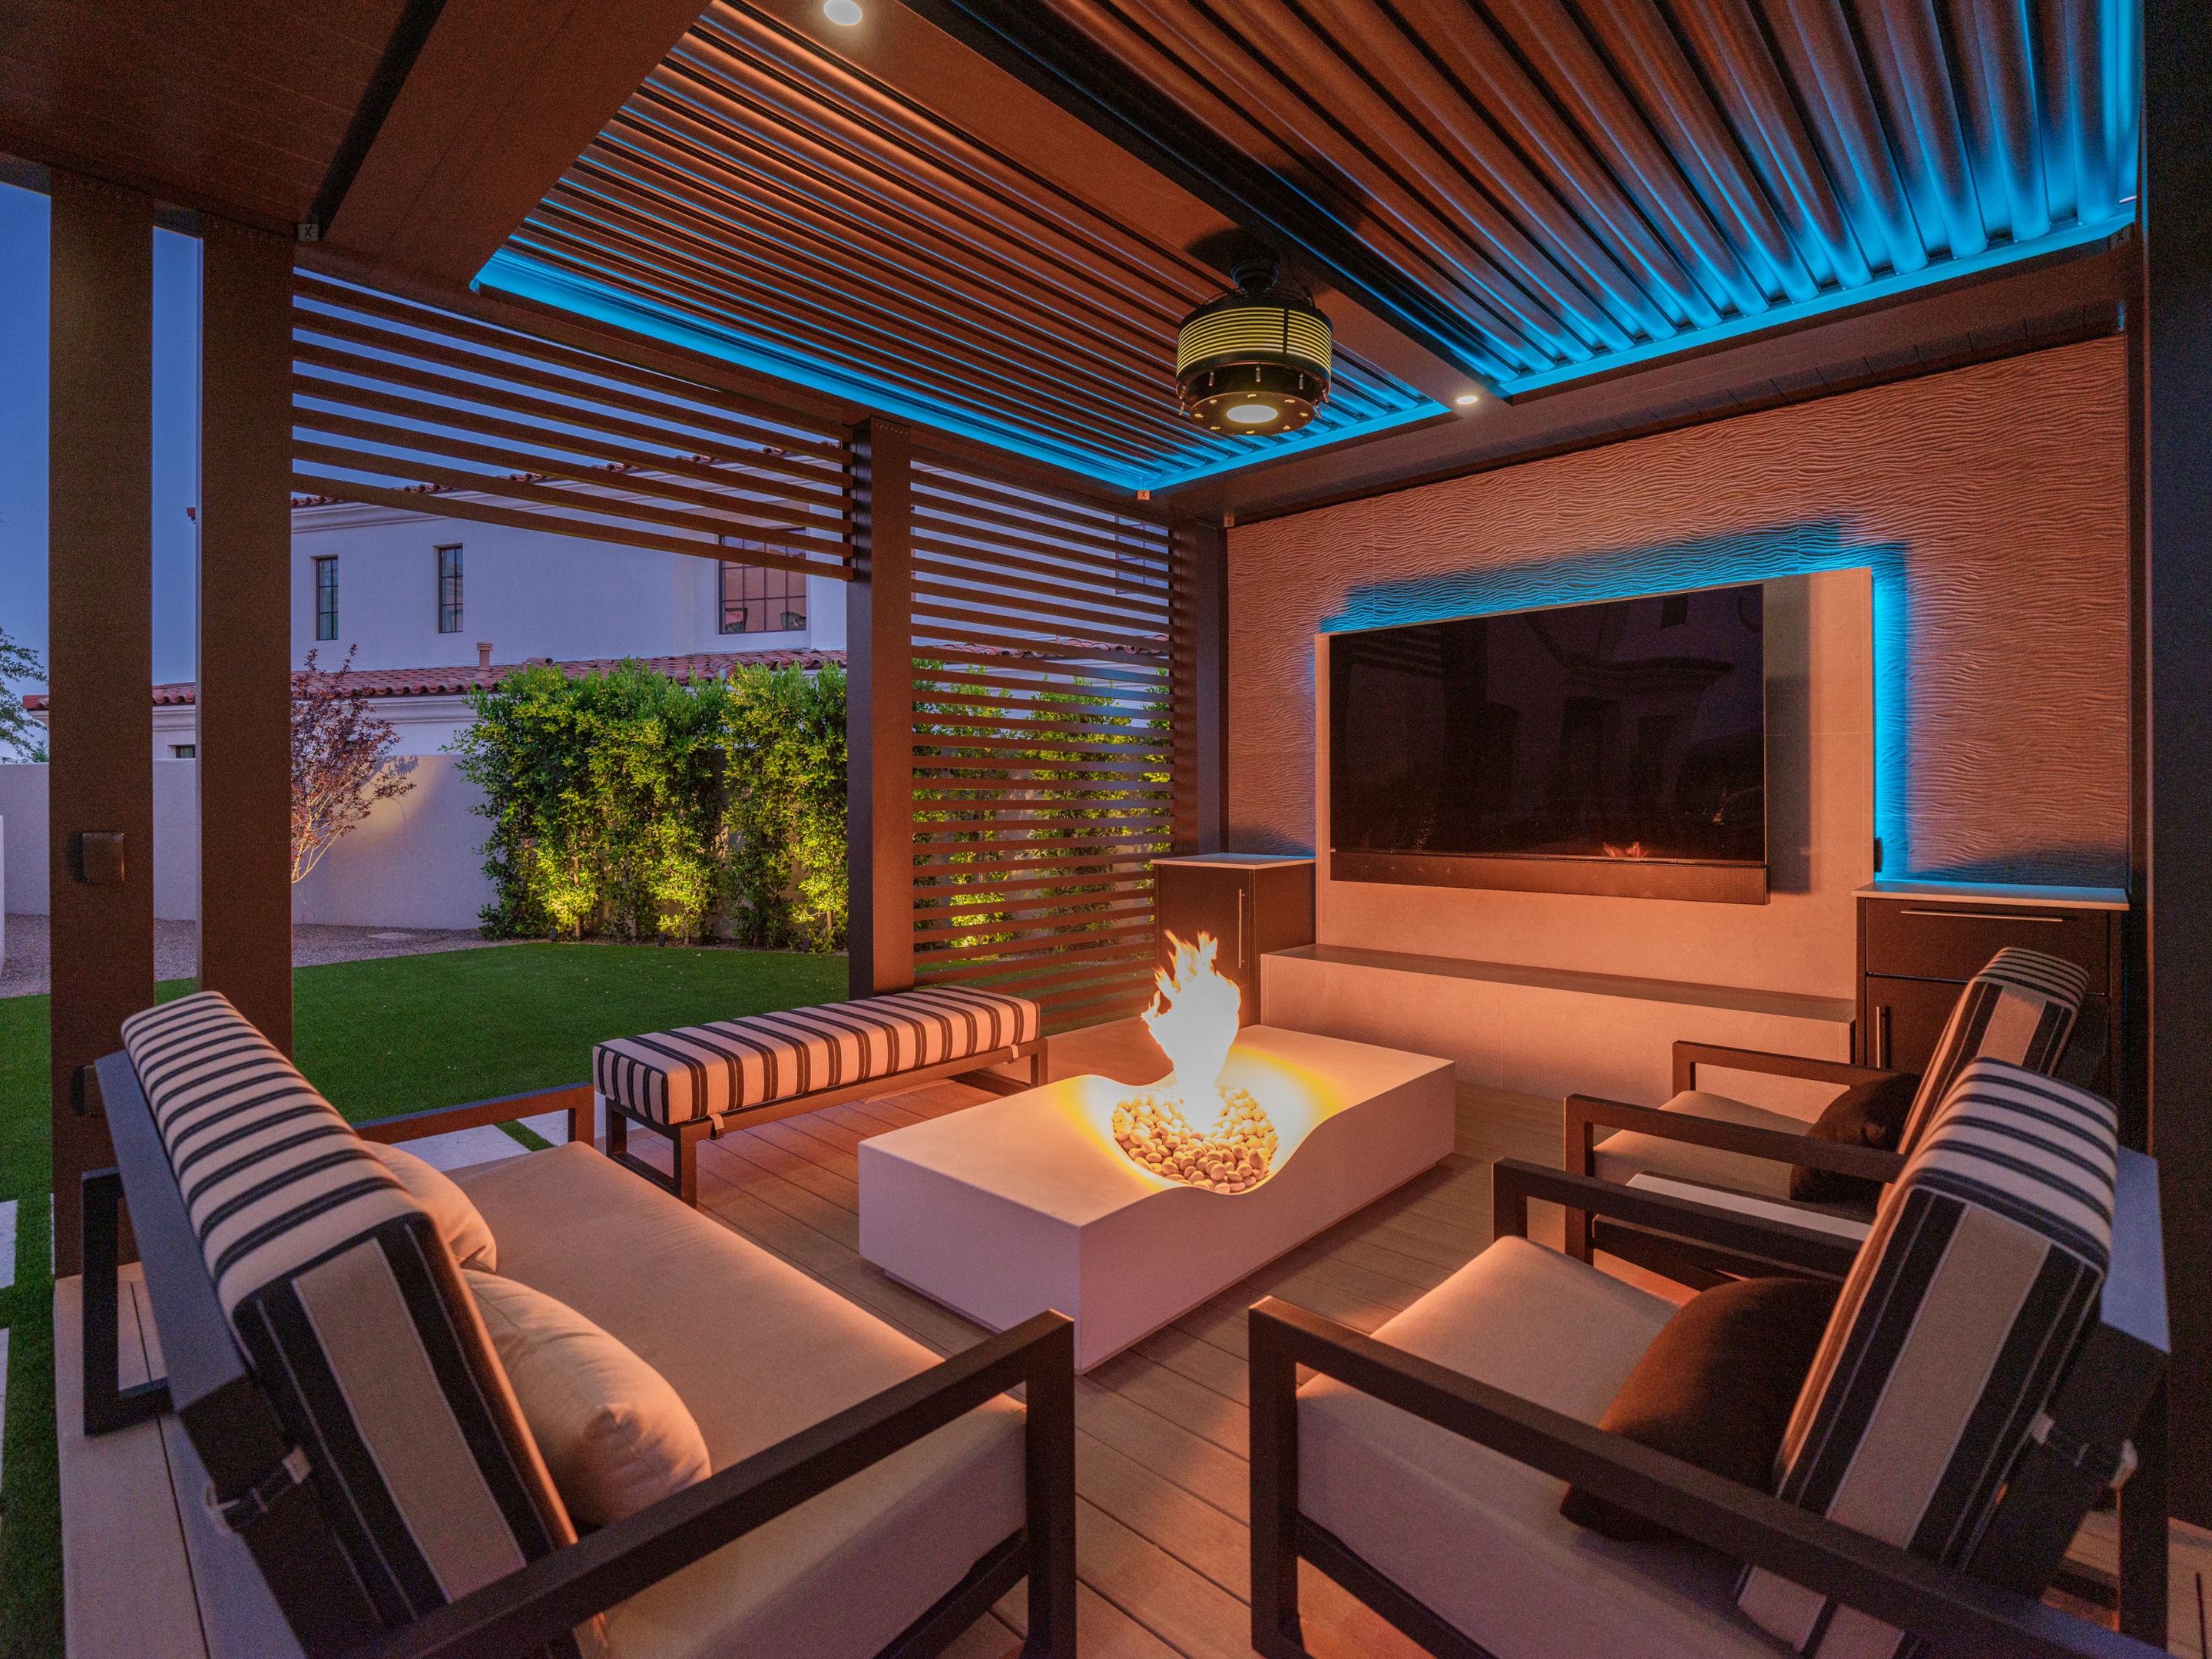
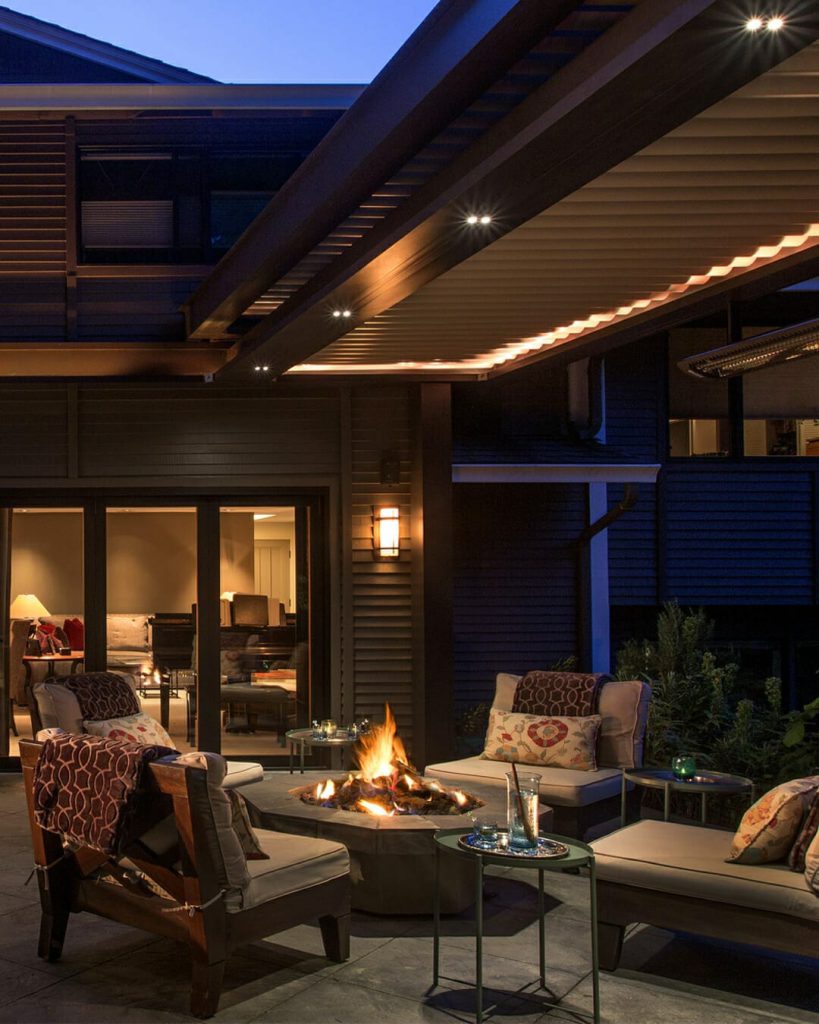
Enhance the ambiance of your pergola with creative lighting solutions. Create a warm and inviting atmosphere by illuminating posts with sconces, and hang paper lanterns, string lights with Edison-style bulbs, or even chandeliers to elevate the overall aesthetic. These options will also help to keep the pergola cool on warm summer evenings. For an energy-efficient option, consider using solar or LED lighting. With the right lighting, your pergola can become the perfect space for relaxing and entertaining on summer nights.
Furniture & Decor
When creating an inviting outdoor living space under your pergola, pay attention to every detail to ensure it reflects your personal style and provides comfort. Carefully selected furniture and decor can enhance the area. Consider incorporating comfortable seating options like couches, chairs, or hammocks, and add rugs and cushions for a cozy touch. Decorative elements such as lanterns, potted plants, and artwork can create a warm and inviting atmosphere, especially when combined with the dappled sunlight filtering through the pergola. Don’t forget to include a pair of chairs to enhance the seating area even further.
Plants and Landscaping
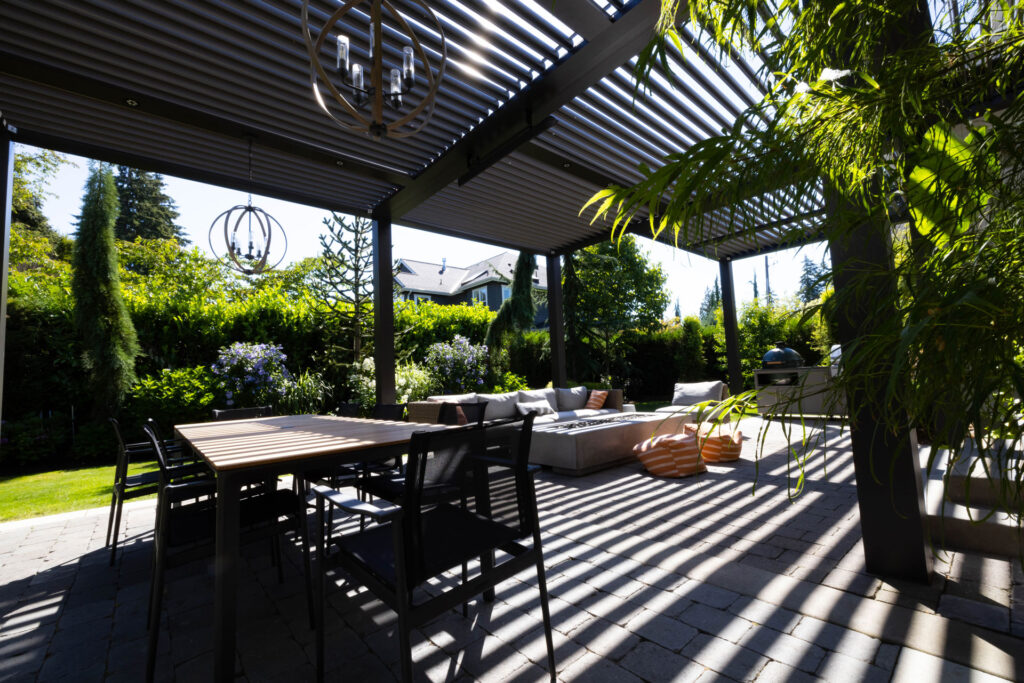
Enhance the unified aesthetic of your pergola’s outdoor space with landscaping features and plantings, such as gravel pathways, statues, water elements, or flowering vines. A stone patio can create a picturesque and practical base for the structure, further enhancing the area’s aesthetic appeal and functionality.
Climbing plants can be grown along the pergola for natural shade and an enhanced overall ambiance. By testing different ideas, you can easily and conveniently design your own personalized exterior environment.
Any combination of these materials, including landscaping elements like stone patios and flowering vines, will complement the pergola and create a magnificent and unique look for your personal outdoor space. For further advice and ideas on how to upgrade this structure, consult with a landscaping expert.
Final Inspection and Completion
Once you’ve completed the construction of your pergola, it’s time for a final inspection to ensure everything is secure and level. This step is crucial to guarantee the safety and longevity of your new outdoor structure. Here’s a checklist to guide you through the inspection process:
- Check the Posts: Ensure all posts are plumb (vertically straight) and securely attached to the post bases. This is vital for the stability of the entire structure.
- Verify the Beams: Make sure the beams are level and securely attached to the posts. Use a level to double-check their alignment.
- Inspect the Rafters: Ensure the rafters are evenly spaced and securely attached to the beams. This will provide the necessary support and aesthetic appeal.
- Secure the Purlins: Check that the purlins (if used) are securely attached to the rafters. This adds extra stability and support to the roof structure.
- Overall Structure: Inspect the entire pergola for any signs of damage or weakness. Look for any loose screws, cracks in the wood, or other potential issues.
Remember, always follow safety guidelines and building codes when constructing a pergola. If you’re unsure about any aspect of the process, don’t hesitate to seek professional help. Enjoy your new pergola and the wonderful outdoor space it provides!
Summary
Building a pergola is a fun DIY project that can transform your outdoor space into a luxurious and inviting retreat. The feeling of accomplishment you’ll get when you see your finished pergola will be amazing! To build your own unique masterpiece, all you need are some basic tools and materials. By following the steps outlined in this guide, you’ll easily be able to create a beautiful and functional space for entertaining or relaxing! We hope you enjoy your new outdoor space and feel inspired to take on more DIY projects! So don’t wait—start crafting your very own pergola today!
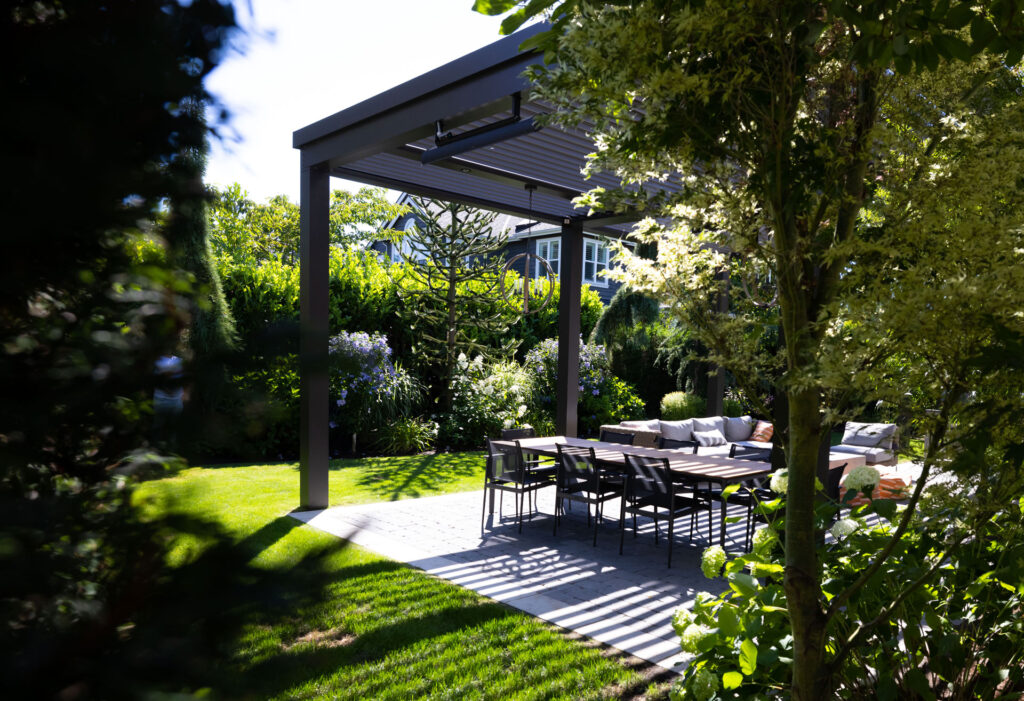
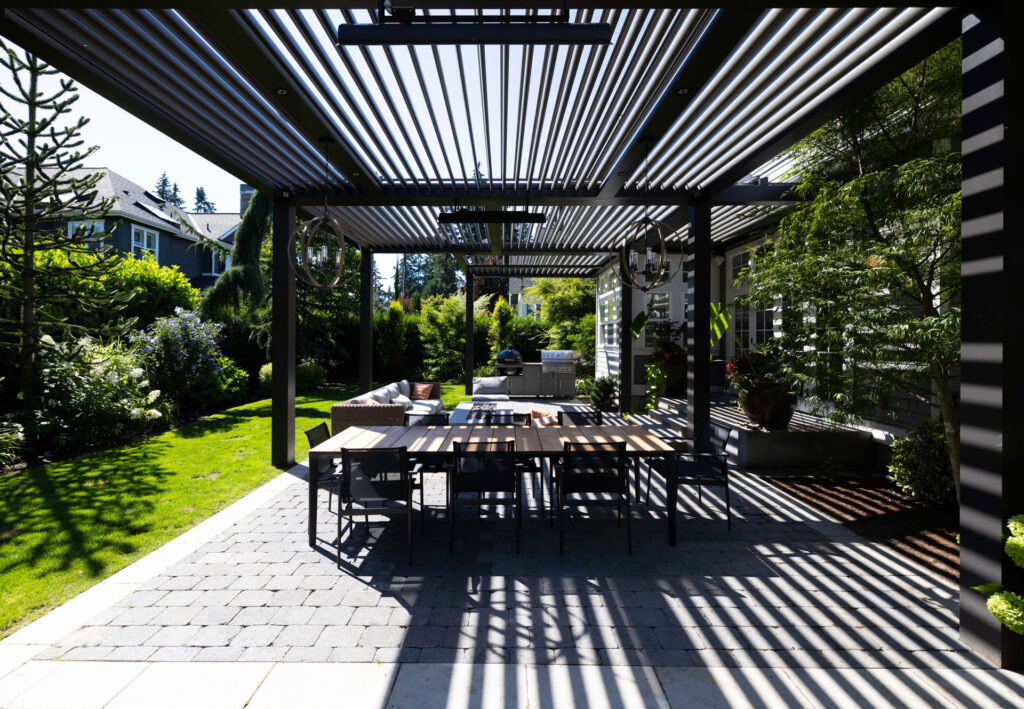
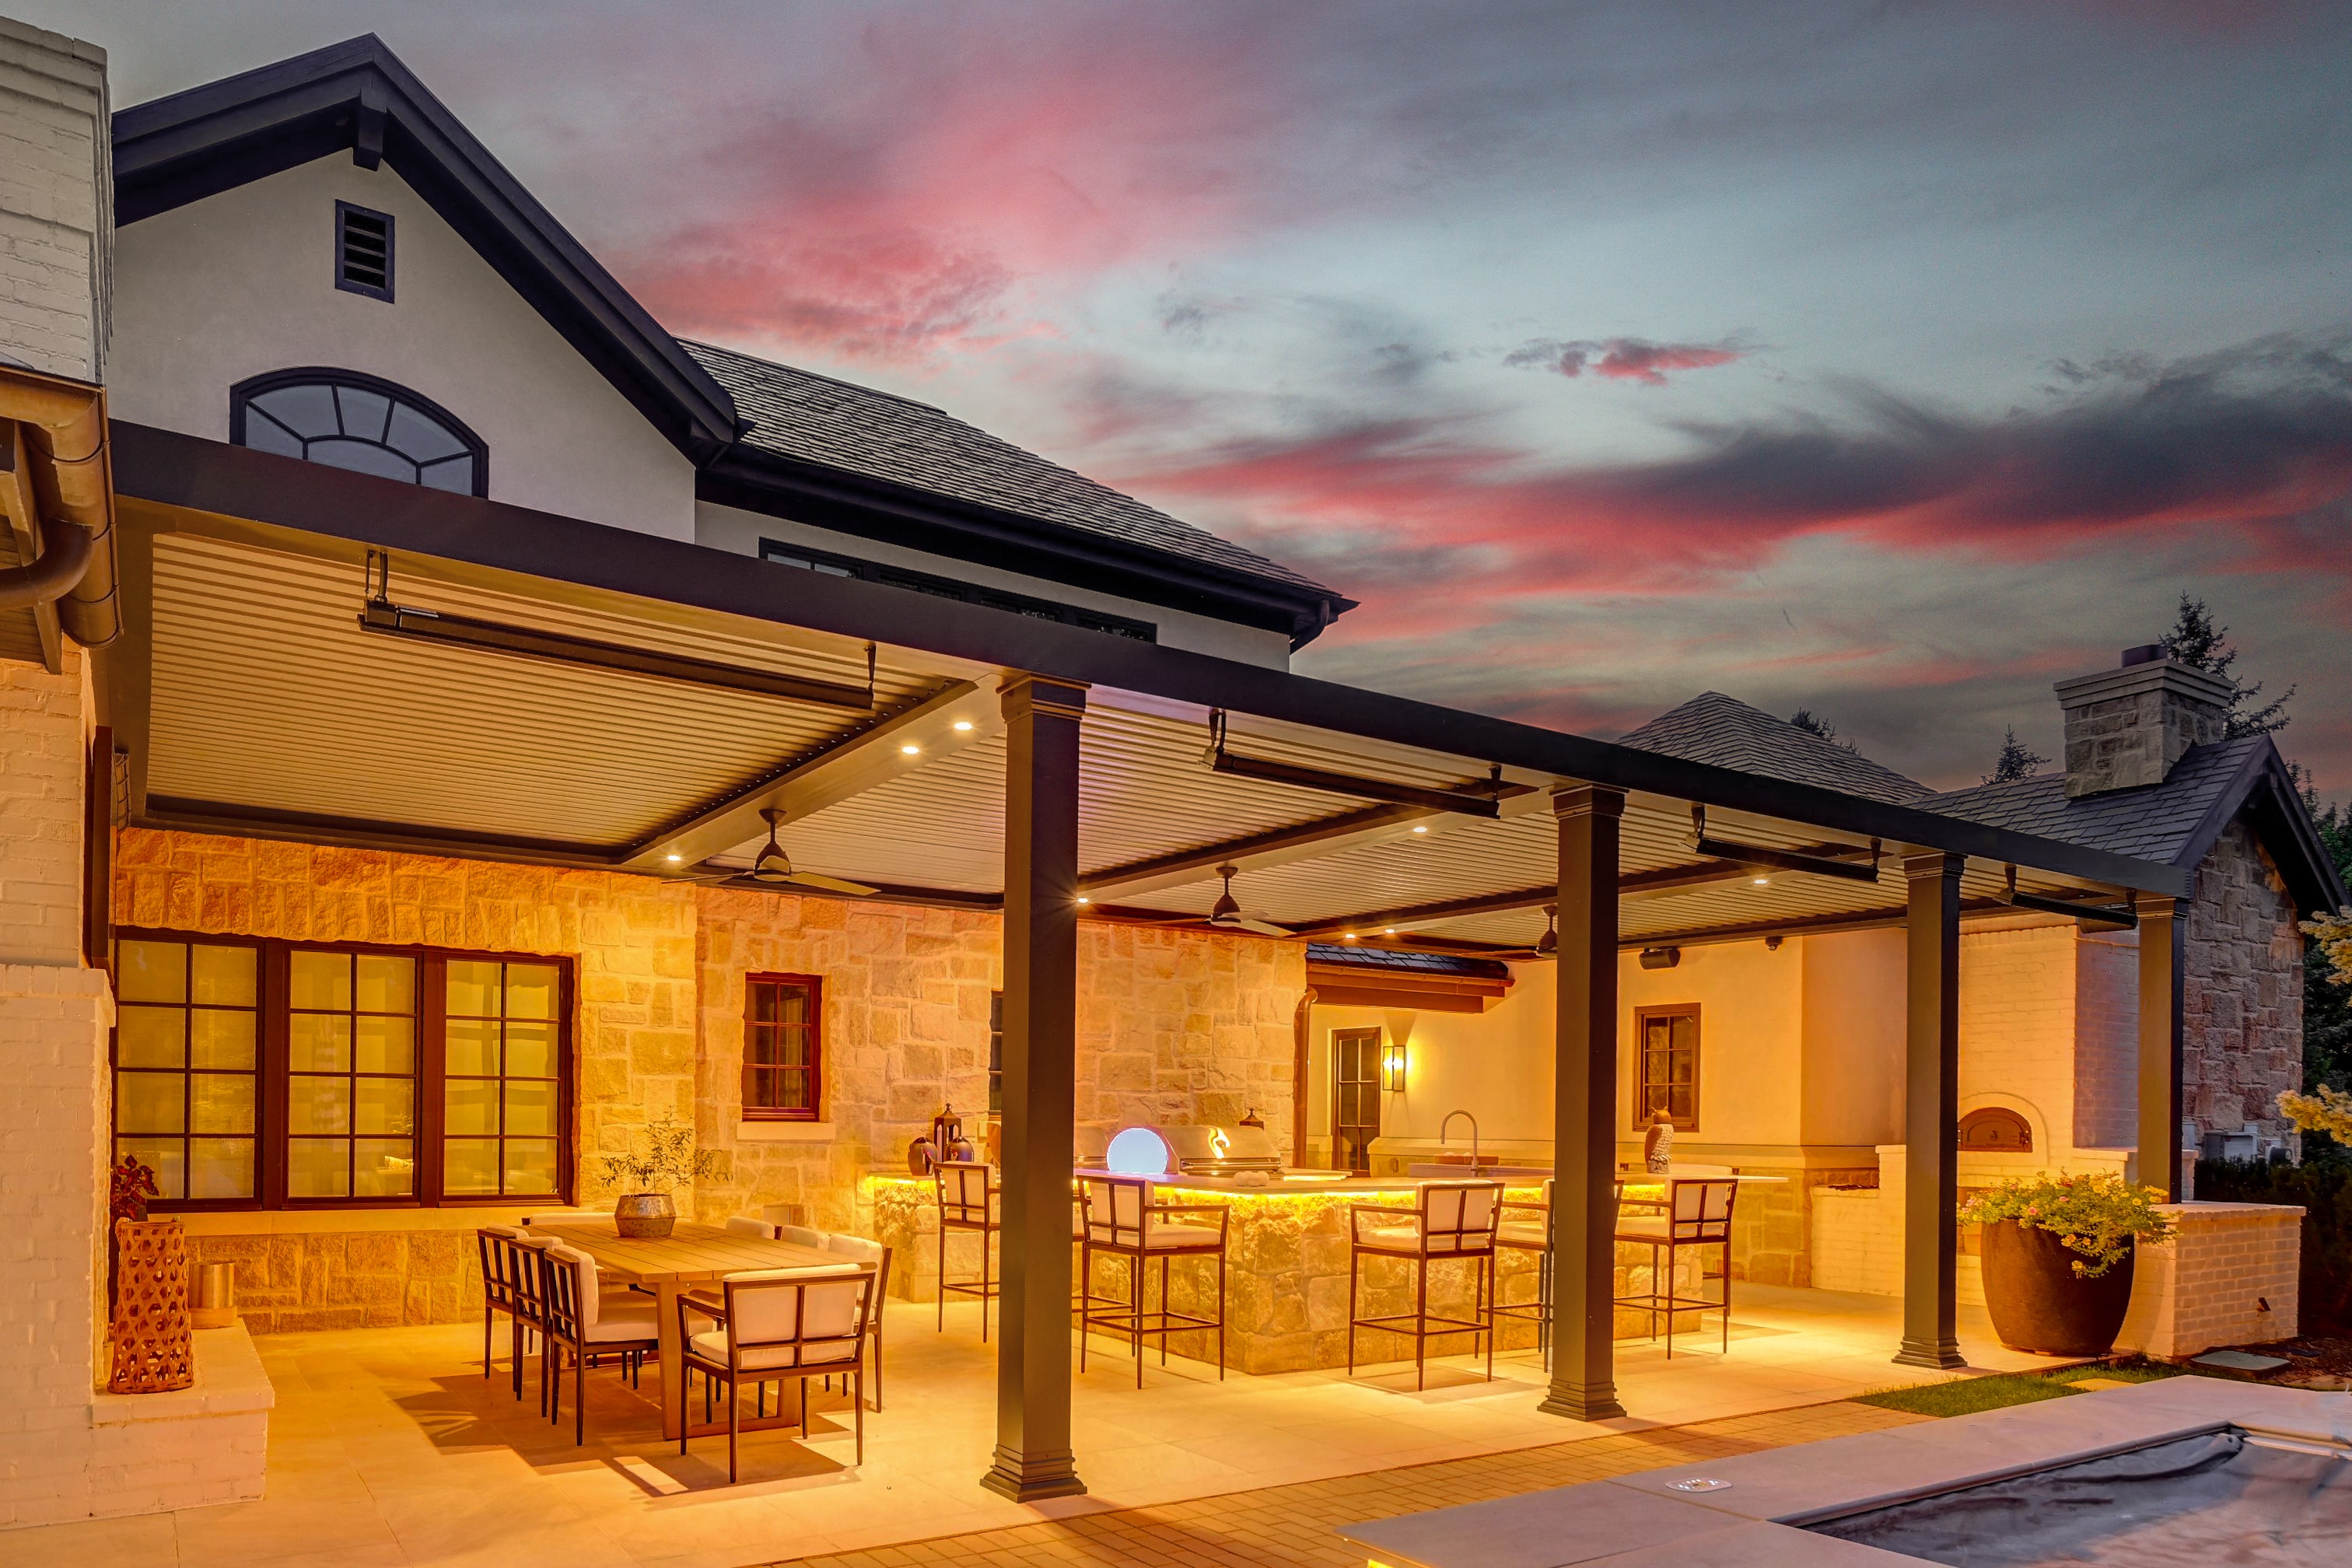
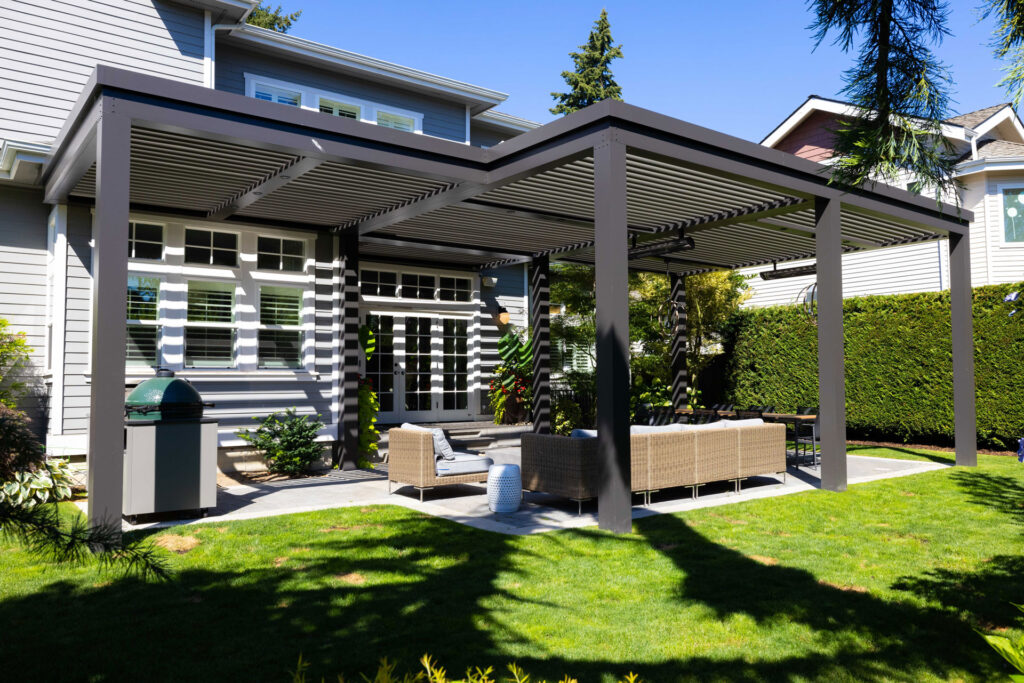
The StruXure Solution for your Existing Patio
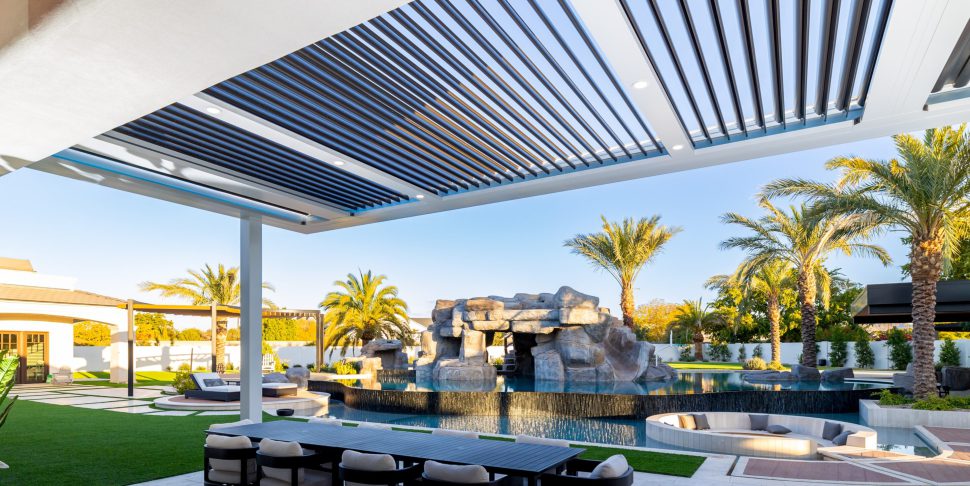
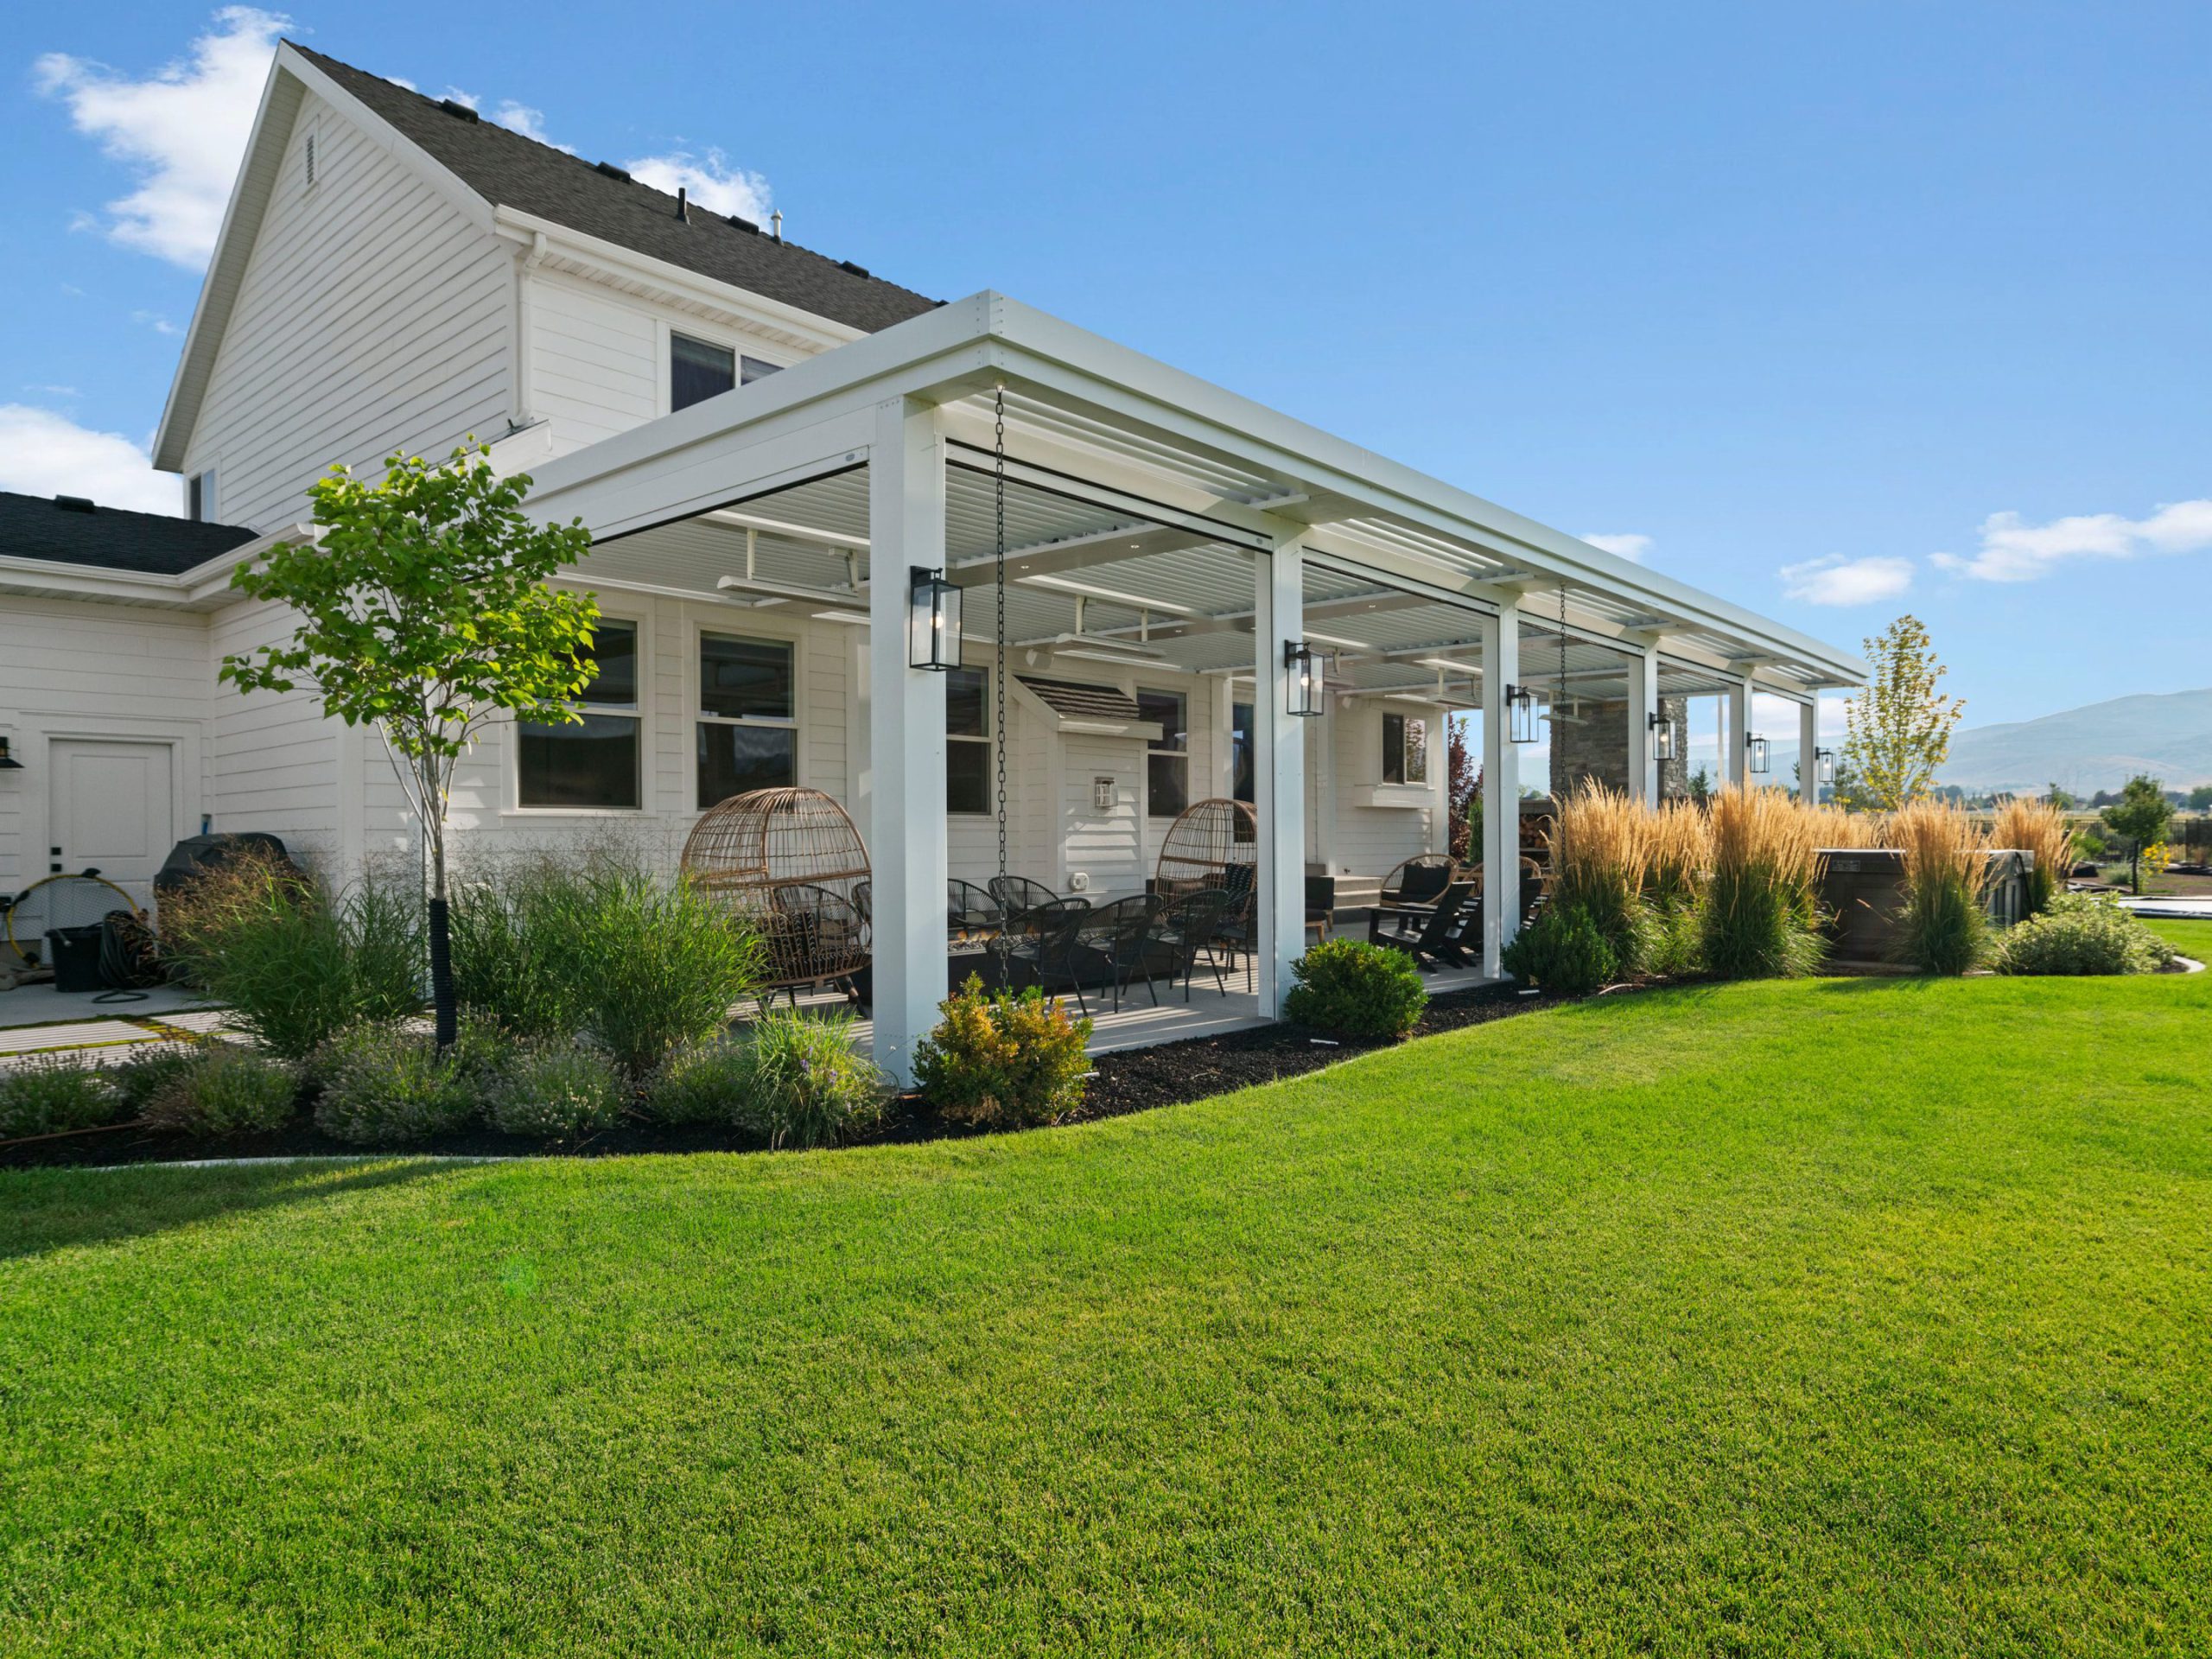
If you’re considering adding a pergola to your patio or deck but aren’t sure if you have the time, tools, or expertise to build one yourself, StruXure has the perfect solution. Our Pergola X and Cabana X systems offer cutting-edge design, premium materials, and advanced smart technology to create an outdoor space that is both stylish and functional. Unlike traditional pergolas, StruXure’s systems feature automated pivoting louvers, integrated lighting, weather sensors, and customizable options to ensure year-round comfort and durability.
Whether you’re a homeowner looking to elevate your backyard or a business seeking to expand outdoor seating, StruXure’s industry-leading solutions are designed to withstand the elements while enhancing your lifestyle. Contact us today, and a local StruXure dealer will help you explore the best option for your space.